A view from the attic with 3 courses removed. Its tight, only 4 (maybe) feet at the peak, so anything up here will be my job. Dropping bricks down the chimney didn't work so I poked a hole in the ceiling and handed them down to Lee one by one. We'll be tearing it out soon, too - but would like to keep the oil bills down as long as possible. All 3 flues had been knocked down below roof level many years ago - very happy we don't have to deal with the roof repair which made this a breeze. Think we will replace this blown in insulation with R-30 batts. Any comments? By the way, I used a FUBAR and Lee used a sledge hammer. The FUBAR has come in handy so far.


After we got a few feet removed the job got easier...

Done! Now we have over 200 bricks for the garden paths and a lot of needed extra square footage. There is a flue just like this to demo in each room. On my trip around the attic I noticed that where these were installed in place of the two original fireplaces (*sniff*) we will gain another 2 feet on both sides of the flue (those fireplaces must have been nice) in the kitchen and 2 bedrooms - wow - possibly shelves, a closet, STORAGE! Its not a hidden room, but its SPACE!

There is another half to remove on the floor below, but we'll tackle that when we tackle the bar/den. Lee looked under the floor and now we know why it was so bouncy - NOT TERMITES (yay!) - but no floor joists for 6 feet (boo!). He sees one that runs diagonal towards the door, very confusing. Hope we don't damage the wood floors and trim when we tear that out to repair.

Glad it's done without much trouble. Lee carried the bricks outside today and did some cleanup so we will be ready to start on the walls and ceiling Saturday. We will be busy with football on Sunday - GO GIANTS!
PS-Mom, I am wearing my pink hard hat, safety glasses, and face mask :)


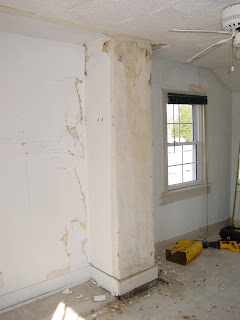
 We also removed the closet since there was barely room for a twin bed in here. We have several of Gramma's wardrobes which will be appropriate. This is only a guest room. The chimney removal is next on the list. The floor in front of the chimney is bouncy - see how it's dropped. Our first "big" repair must be under there. As long as its not termites we'll be happy! At least this was a quick and easy start.
